What’s New
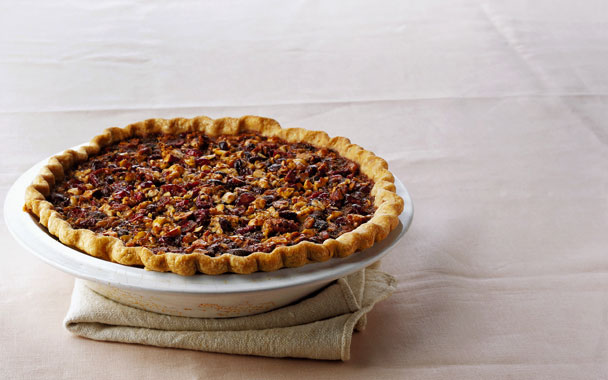
Despite their reputation as a difficult endeavor, great crusts are relatively straightforward, crafted by treating a few ingredients with care and a bit of finesse.
In fact, we can now recommend cutting down the number of ingredients by one. After years of making our pastry dough with shortening as well as butter, food editor Maggie Ruggiero decided to revisit the all-butter version. She was inspired primarily by the information that has recently come to light about the health problems with trans fats, which are contained in the partially hydrogenated oils in old-fashioned shortening. You can now find trans-fat-free shortenings, such as Spectrum and Earth Balance (available at natural foods stores), but we really don’t think that’s necessary. Our recent tests showed that, though a high proportion of shortening makes a very flaky crust, going all-butter gives a satisfyingly flaky crust that is richer tasting, a definite plus in our opinion.
Tried & True
Preparing Ingredients
· Measure the flour by spooning it into the measuring cup and leveling it with the back of a knife or other straightedge. Don’t tamp down the flour and don’t use the cup as a scoop.
· If your kitchen is particularly warm, freezing the flour until well chilled before mixing the dry ingredients is helpful.
· We recommend using bleached all-purpose flour for pastry because the bleaching process, aside from whitening the flour, helps it to absorb water more uniformly. If you have only unbleached flour in the house, you can use it for your pastry dough, but you may need to add slightly more water.
· Be sure to use unsalted butter, which not only tends to be fresher but also allows you to control the amount of salt in the recipe. The butter should also be well chilled, as should any other fat you use in your crust; what you don’t want is for the fat to melt into the flour when you blend the ingredients together.
Assembling the Dough
· You can “cut” the fat into the flour mixture with your fingertips, a pastry cutter, or a food processor, according to your personal preference. Fingertips are very effective if you’re the type with nice cold hands. If you choose to go with a pastry cutter, those with flat blades tend to work better than those with rounded wires; look for one that’s comfortable in your hand and has a good grip. The food processor is quick and easy, but you are more likely to overwork the dough when using one, which will result in tough pastry. A good compromise is to pulse the butter and dry ingredients together in the processor, transfer the mixture to a bowl, and then stir in the water with a fork.
· Whichever cutting method you choose, be sure to leave some pea-size lumps, essential to creating flakiness.
· Adding water is where it gets tricky. The water must be very cold, and you want only enough for the dough to come together when you squeeze a handful. A dough that’s too wet requires extra flour when rolling and can lead to shrinkage when baking (and, again, to tough pastry).
· We like to bring the dough together using a method called fraisage. Once the fat has been cut in, use the heel of your hand to smear the mixture forward across the work surface, using a light touch so you don’t uniformly blend in the butter. Leaving it streaky also helps produce a flaky pastry.
Chilling the Dough
· When the dough is ready, gather it up from the work surface—a bench scraper or offset spatula is helpful here—form it into a disk, and chill it for at least an hour. Do not be tempted to skip this step: The chilling relaxes the glutens (making the dough easier to roll out), keeps the fat cold and firm, and allows the water to be evenly absorbed. That said, though, if the dough gets too cold it will be hard to roll and can crack; let it stand on the counter until you can lightly indent the surface with your finger.
Rolling Out
· We recommend using a canvas pastry cloth rubbed with flour and a sock-like rolling pin cover, so that very little additional flour is absorbed by the dough during rolling. The cloth also makes it easier to move the dough around during rolling.
· Rotating the dough in quarter turns as you roll helps keep it in a round and ensures that it is truly being rolled rather than stretched. (Imagine the rollers of a pasta machine or a vintage laundry mangle.)
· Rolling outward from the center and applying even pressure will result in a round, uniformly thin dough.
· If the dough sticks to the surface during rolling, it is being stretched rather than thinned. This will toughen it. To prevent this, gently lift the dough and dust flour underneath.
· We love the simple dowel-like French rolling pins for the control they give, and we also find that they make it easier to transfer the dough, by wrapping it gently around the pin and then unrolling it over the pie plate. If your rolling pin is the type with handles and ball bearings, you have to hold the pin to keep it from spinning while you transfer the dough.
Fitting the Dough
· We’ve come up with a great little device for fitting the dough evenly into the pie plate. Simply wrap up some dough scraps in a bit of plastic wrap, then twist the wrap to form a small, soft, nonstick pouch. Use this to lightly press the dough into the plate, which prevents you from overhandling the dough with warm hands (or nicking it with a fingernail).
· Express yourself through crimping, fluting, or scalloping a decorative edge, then loosely cover your pie shell with plastic wrap and chill it thoroughly.
 Pinterest