From succulent braised chicken to flavor-soaked pot roast, a good braise fills the house with enticing aromas that draw everyone around in anticipation of a comforting meal. Vegetarians and fish lovers can also get in on the pleasures—and ease—of braising by adapting this time-honored technique to sturdy winter vegetables and firm-fleshed fish.
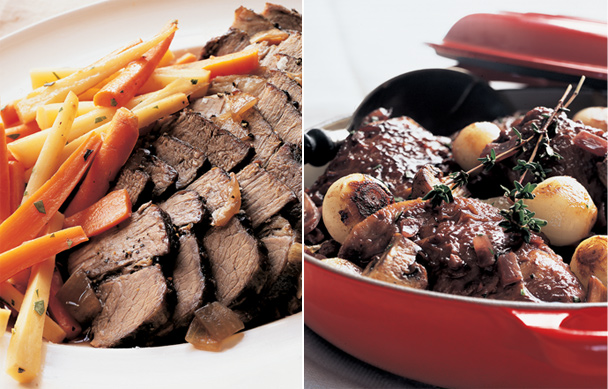
At its most basic, braising entails gently cooking in a covered pot with a little bit of liquid, yet it is also open to infinite improvisation. Keep in mind the tips that follow, and you’ll be creating wonderful braises all winter long. A great place to start is with my three accompanying recipes: Coq au Vin, Zinfandel Pot Roast with Glazed Carrots & Fresh Sage, and Honey-Glazed Five-Spice Baby Back Ribs.
1. Choose the right main ingredient for taste and texture.
A successful braise delivers swoon-worthy tenderness and a satisfying depth of flavor—as long as your main ingredient is well chosen. For meat or poultry, this generally means selecting cuts from the tougher, more rugged, and often more economical parts of an animal, such as the shoulder, leg, neck, and brisket. It helps to understand that all meat is muscle, and as muscles develop, they get tougher and more flavorful. When it comes to cooking, the only way to coax these hardworking muscles to tenderness is with gentle, moist heat—as in braising. Fortunately, when tough cuts collapse into succulent morsels, their true flavor comes forward, delivering fantastic taste and texture. Here are some favorite braising cuts:
- Beef: Chuck roast, blade roast, short ribs, brisket, and oxtail
- Veal: Shanks, shoulder, and breast
- Pork: Boston butt, shoulder, ribs, and belly
- Lamb: Shoulder, leg, shanks, and breast
- Poultry: Thighs and legs
When it comes to nonmeat braises, look for sturdy varieties of seafood or vegetables. For instance, the best seafood choices have a dense, not-too-delicate texture; halibut, tuna, salmon, scallops, and shrimp all fit the bill. Fish steaks hold up a bit better than fillets, and the bones add flavor to the braising liquid, though fillets can work well, too. For vegetarian options, focus on hearty, fibrous vegetables such as cauliflower, leeks, cabbage, fennel, and winter root vegetables.
2. Choose the right pot.
Braising dates back to ancient times, long before ovens, when a cook would tuck ingredients into a tightly covered pot and bury the pot in the embers of a slow fire. (The term comes from braise, the French word for “ember.”) Today, the ideal braising pot is one that mimics this mellow, even transfer of heat—a cast-iron Dutch oven, with or without enamel coating, is perfect. If you don’t have a proper Dutch oven, reach for the heaviest pot with the tightest-fitting lid you can find. When it comes to size, choose a squat pot that fits the ingredients snugly—this results in the deepest concentration of flavor.
3. Brown the meat, poultry, or vegetables.
Braises often start with browning meat, poultry, or vegetables in a small bit of fat in order to achieve an appetizing rich color and boost the overall flavor. One key to browning (also referred to as searing) is to be sure the surface of the food is dry before it goes into the pot; a wet surface will cause meat and poultry to spatter and stick, and wet vegetables won’t develop the gorgeous caramelized surface we’re after. I generally pat the food dry with towels and season it just before browning (unless, of course, I’ve marinated or preseasoned it).
Heat the braising pot over medium-high, and add just enough fat to cover the surface of the pan. Depending on the dish you’re making, you can use anything from vegetable or olive oil to duck or pork fat. Once the fat is hot, add your main ingredient, taking care to avoid overcrowding. For instance, when working with smaller pieces—such as short ribs or chicken thighs—brown them in batches, allowing enough space between pieces so they sizzle and don’t steam. And finally, be patient when browning—don’t turn too soon or often—and adjust the heat if needed. Your goal is to develop an even, nicely browned surface without scorching.
When it comes to braising seafood, it’s best to skip the browning and start with the aromatics (step 5). It’s a necessary shortcut, since both browning and braising would overcook the seafood. And if there’s a slight trade-off in depth of flavor compared with a meatier braise, there is also some time saved.
 Pinterest