Puff pastry is one of the wonders of the baker's art. The time invested in kneading, folding, beating, and rolling the silky dough transforms simple ingredients into buttery, flaky, golden-brown layers that are a point of pride among amateurs and professionals alike. Making the jump from store-bought to homemade can be daunting, so read on for the insider's guide to reaching puff pastry nirvana in your own home.
1. The Big, Buttery Picture
Puff pastry is composed of two main elements: a dough layer (detrempe) and a butter layer (beurrage). The basic technique, known as lamination, involves rolling and folding the detrempe around the beurrage to create countless alternating thin layers. When the resulting dough is baked, the water content in the melting butter evaporates, creating steam. The steam fluffs up the dough, producing the puffy, delicate layers for which this pastry is named.
2. Five-Ingredient Fix
Puff pastry is composed of five key ingredients: flour, butter, water, sugar, and salt. To make 2 1/2 pounds of puff pastry, enough for two 11-inch tarts or several dozen cheese twists, first make the detrempe by combining 12 ounces of all-purpose flour with 4 ounces cake flour in a large bowl. (Note: Measuring flour by weight, using a kitchen scale, is more accurate than measuring by volume.) Rub together the flour mixture with 4 ounces of softened unsalted butter, using your fingers to thoroughly incorporate the butter into the flour. In a separate small bowl, whisk together 1 cup cold water with 1 1/2 teaspoons sugar and 1 1/2 teaspoons salt. Add the water mixture to the flour-butter mixture and work it together with your hands to form a shaggy dough, which will appear ropey and uneven rather than smoothly combined.
To make the beurrage, sprinkle your work surface (preferably any surface other than wood, which retains too much humidity) with 2 ounces of all-purpose flour and then place 1 pound of cold unsalted butter atop the flour. Use a rolling pin to firmly beat the butter, flattening it until it is just soft enough to roll. Roll out the butter to form a 6-inch square measuring approximately 1 inch thick.
To assemble your puff pastry package, press the detrempe into a square that is approximately 1 inch thick. Roll out the four corners of the detrempe into flaps that are about 1/4 inch thick and that stretch 8 to 10 inches away from the center. Add the beurrage to the center of the dough and fold the four flaps over the butter to enclose it, pinching together any holes where the butter peeks through.
3. Avoiding a Sticky Situation
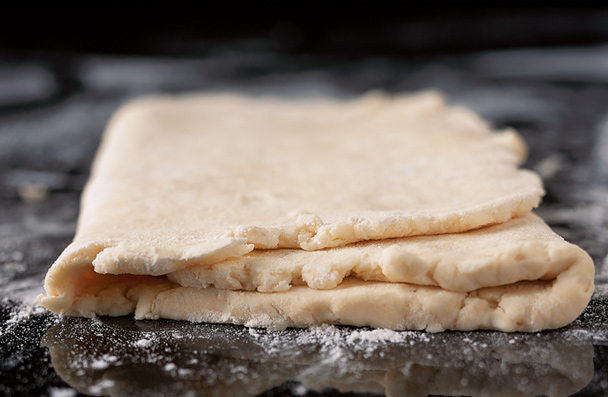
Now it's time to prepare your work surface for rolling and shaping the puff pastry. Less is more when it comes to flouring the surface to keep the dough from sticking. The dough, especially when slightly warm, will absorb any flour it comes into contact with, and excess flour will make the dough dry and tough as well as more likely to burn in the oven.
For the best results, scrape underneath the entire length of the dough with a large offset spatula after every few rolls with the rolling pin. This will loosen and shift the dough and reduce the risk of sticking or tearing, while ensuring an even thickness and minimizing the need for flouring.
4. Rolling in the Deep
With your package of butter and dough assembled, and your work surface properly prepped, it's time to start the rolling and folding process that will create the countless flaky layers. It's important to note that the colder your kitchen is, the better, as the butter will inevitably melt quickly.
Begin by pressing your rolling pin firmly into the dough and rolling back and forth to flatten it out into a smooth rectangle that is approximately twice as long as it is wide and roughly 1/8 inch thick. Next, fold the dough rectangle over itself by choosing between a single fold (similar to a letter that's folded in three parts) and a double fold (such that the ends are folded halfway in, and then the halves are folded once again). Double folds create more layers; however, double-folded dough is more difficult to manage since it is twice as thick.
Rotate the folded package of dough 90 degrees and roll it out until it is roughly 1/2 inch thick. Repeat the rolling, folding, and rotating process six times if doing a single fold, and four times if doing a double fold. Whether you're single- or double-folding, wrap the dough securely in plastic wrap and let it rest in the refrigerator for a minimum of one hour after every two folds, which leads me to…
5. Patience Is a Virtue
There is a significant amount of resting and waiting when making puff pastry. While one hour is the minimum amount of time to refrigerate the dough between every two folds, you can actually wait up to 24 hours to guarantee that the gluten proteins have had ample time to relax before being repeatedly stretched and folded. Relaxed gluten proteins are much less likely to tear during the lengthy rolling and folding process, and fewer tears mean a more perfect flake on your puff pastry. Ample resting time also ensures you'll get the puffiest results when baking.
After you've finished the entire rolling process, wrap up the dough tightly in plastic wrap and refrigerate it for at least 4 hours and up to 24 hours before moving on to the cutting and shaping phase.
6. A Cut Above the Rest
Steer clear of knives when it comes time to portion out the dough. The long edge of knives, especially duller-edged ones, drags through the many precious layers you've created in the rolling process and will cause the layers to compress. A pastry wheel is your best bet for quick, clean cuts that will preserve the astonishing layers.
Cut the pastry into your desired shape, such as circles to place atop ramekins for potpies, long strips to twist together for straws, or logs to form into sweet palmiers. Once cut, transfer the dough back into the fridge for a quick chill before baking. Chilled puff pastry is more likely to retain its shape when placed in a hot oven. If you start with a warmer dough, the butter melts and oozes out before the water in it has the chance to evaporate and create the layers, which will result in a less-than-puffed appearance.
7. Tour de Glaze
With your prepared puff pastry cut and chilled, it's time to move on to the last step of the pre-baking process: the egg glaze. Much like pie dough, puff pastry dough should be brushed with egg glaze before baking to give it a beautiful sheen.
To make the glaze, whisk together one egg yolk with a splash of water. Use a pastry brush (and a light hand) as you apply the glaze to the dough. Be careful to keep the glaze from running over the edges of the pastry, as any egg glaze that drips over will seal the cut edges of the dough, preventing steam from escaping and thus interfering with the dough's puff-ability.
8. Dark, Dry, Done
Baking puff dough is different from baking other pastry doughs due to the extraordinary amount of steam the butter generates. To measure the doneness of the dough, feel for dryness on the surface rather than simply judging by the color of the crust. While you're aiming for a deep golden brown, the dough should also be completely dry and cooked throughout, without any pockets of damp dough on the surface of the pastry.
Time and patience are the two real keys to reaching puff pastry paradise. But once you make the jump away from the store-bought stuff, you'll discover that there are few foods that afford greater satisfaction than endless layers of buttery, flaky homemade pastry, whether in the form of fruit-filled or savory tarts, potpies, or chocolate-drizzled profiteroles. And with lazy summer days ahead, time is on your side, so harness your persistence, crank up that AC, and let the rolling and folding begin!
Michelle Tampakis is a chef-instructor in the career Baking & Pastry Arts Program at The Institute of Culinary Education (ICE) in New York City and the director of the Center for Advanced Pastry Studies program. She was chosen as one of Dessert Professional magazine's Top Ten Pastry Chefs in 2010.