Homemade pasta.
The words alone are enough to evoke thoughts of hours upon hours of flour flinging for a single bowl of everyone’s favorite carb. But with the right recipe and a few tips on technique, the DIY version is actually easier than you might think. The best place to start is with the basic setup and ingredients (all two of them), and if available, a fun-loving friend who doesn’t mind payment in the form of wine and pasta.
Making the Dough
To begin, create your pasta-making space: A wooden board or smooth surface like granite, marble, or stainless steel is the best option. Avoid tile countertops: The grout between the tiles creates an uneven surface for kneading. In Italy a wooden board is traditionally used—usually one passed down through the generations with a patina of at least 50 years of hard labor.
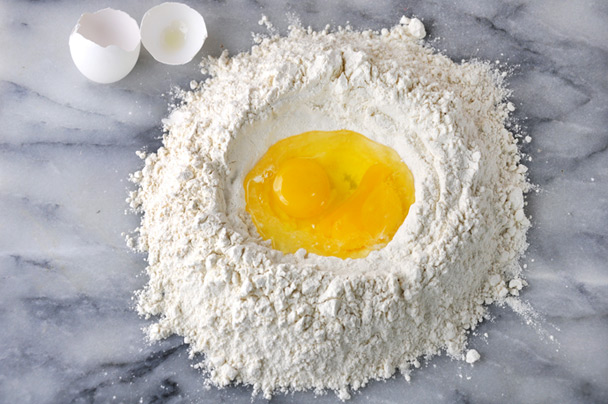
Once your surface is set, select the type of flour. I prefer a traditional Italian type known as 0 flour, which has more protein content than its sister flour, 00, and American all-purpose flour. However, the 0 and 00 types of flour are often difficult to find in our grocery stores, so all-purpose flour is a fine substitute. For two servings of pasta, add 1 2/3 cups flour to your surface, making a large well in the center that will hold twice the volume of 2 eggs. Add 2 whole eggs, unbeaten, and then use the back of a fork to beat the eggs while slowly drawing in small portions of the surrounding flour. Continue this motion until the mixture can be worked with your hands, at which point start kneading the pasta by using the palm of your hand to push the dough away from you. Knead the dough for about 10 minutes, adding 1 to 2 tablespoons of flour if at any point the dough feels too sticky.
The 10-minute mark is critical to ensure pasta dough that is smooth and pliable but not sticky. Once you’ve reached this consistency, place the ball of dough under a kitchen towel and allow it to rest for 30 minutes to 1 hour at room temperature. I often skip this resting step without any adverse effect, but if you have the time, it’s a good idea to let the gluten take a breather prior to being rolled out.
Rolling the Dough
The second step in the pasta-making process is where technology trumps tradition. Although there’s a certain nostalgia to rolling the dough into paper-thin sheets by hand, there really is no reason not to embrace a machine and save yourself the time and workout.
A pasta machine is an incredible investment, and one that will produce results no one could find fault with. There are two basic options: hand-crank or electric. Every machine manufacturer has its own system and settings, but generally the hand-crank makers have six settings dictating the thickness of the pasta while electric options, such as the KitchenAid pasta roller attachment, have eight. Whether you’re using hand-crank or electric, it’s important to start with your maker on the setting that creates the largest amount of space between the rollers. For example, this would be setting number 6 on the Imperia or Atlas brands of hand-crank pasta makers and setting number 1 on the KitchenAid attachment.
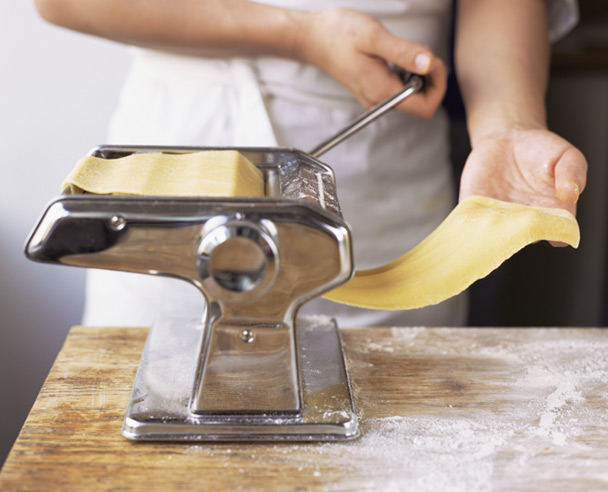
Divide your prepared pasta dough into 3- to 4-ounce pieces, setting aside one piece to roll and keeping the rest covered with a kitchen towel to prevent drying out. Slightly flatten the piece with the palm of your hand so it can fit between the rollers, then place it on the machine and either start hand-cranking to pass it through or simply turn on the mixer if using the KitchenAid attachment. The dough will begin to compress between the pressure of the rollers as you guide it through the bottom and out of the machine (pictured above).
Lay the sheet of dough on the table then fold one end two thirds over, and the other end over that (mimicking the motion of folding a letter). Run the folded dough through the roller again, repeating the rolling then folding process at least eight times with the maker on the widest setting. You are aiming for dough that feels satiny smooth. Once you achieve this consistency, move the pasta machine one setting tighter so that the space between the rollers shrinks. Put the sheet of pasta through the rollers one time, then tighten the pasta machine one more setting and pass the pasta through it once again. With each pass, your sheet of dough will get thinner and thinner, and it should also be getting as wide as the width of the rollers. To prevent the dough from sticking or tearing, sprinkle a small amount of flour over the sheet of pasta between each pass. (This may take a few practice tries the first time but you will soon get the hang of it.)
 Pinterest