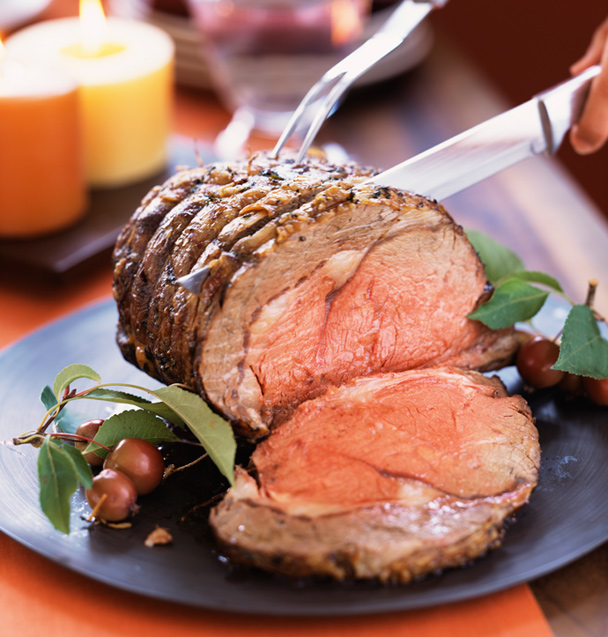
Few foods draw as much attention as a perfectly seared roast. Eyes open wide at the sight of a razor-sharp knife slicing through a crispy golden-brown skin to reveal tender strips of juicy meat. If there’s ever a meal to steal the culinary spotlight, this is it. Now you can transform your everyday roast into the holiday’s star attraction with a few insider tips used by the pros.
Setup
The main goal of roasting is to produce foods with a crispy exterior and a moist interior that’s been cooked to a specific degree of doneness, including “rare” to “well-done” for tender cuts, and fork-tender to barely-falling-off-the-bone for tougher cuts. But before you can set your sights on a cool pink center, you have to first set yourself up for success by selecting the proper roasting pan.
Opt for a shallow pan, with low straight or sloping sides. This design is critical for achieving the perfect caramelized crust because it allows excess moisture to be released. If the pan is too deep, the buildup of moisture will create excess steam, which will prevent browning and cause poor crust formation. It is also essential to set the roast on a rack so that the meat isn’t in direct contact with the pan—otherwise the bottom of the roast will burn.
Techniques
Before considering your seasoning options, decide between the two primary techniques for roasting: high heat and low heat. High-heat roasting is classified by the 350°F to 450°F temperature range, while low-heat roasting is between 200°F and 325°F. Both options have their pros and cons.
High-heat roasting allows for better crust formation and imparts more flavor and color to your foods. This technique is ideal for tender rib and loin cuts, as well as thicker cuts of meat (think chops, bone-in steaks, or bone-in poultry breasts) and smaller cuts such as rack of lamb or a three-rib section of a prime rib of beef.
Low-heat roasting is more suitable for larger cuts, such as a seven-rib section of a prime rib of beef, leg of lamb, pork shoulder, or a whole turkey, duck, or goose. Tougher cuts stand up well to the low-heat method, as the extended time they require in the oven further tenderizes the meat. The one drawback: The method also imparts less color and possibly less flavor, depending on the preparation.
But there are ways to prevent any loss of flavor, such as using your favorite marinade, dry rub, or cure prior to low-heat-roasting your food. Flavored oils, marinades, and compound butters add flavor and result in better surface browning. Brining your food in a mix of liquid (such as water), salt, sugar, and aromatics prior to roasting will also impart flavor and ensure the interior of the food remains moist. Just remember to avoid seasoning your item with too much salt early in the roasting process (regardless of whether you’re low- or high-heat roasting), as doing so will draw out moisture from the meat and may inhibit browning.
I often use a combination of high- and low-heat roasting techniques to get the best of both worlds: a savory crust and a tender interior. To do this, first roast the food at the high temperature of 450°F—which helps brown the surface of the meat and adds a crispy texture—and then reduce the heat to 325°F and continue roasting until the food has reached your desired level of doneness.
Timing and Temperature
Two main factors affect how long you should cook your roast: the temperature of your oven and the weight of your food. I’ve developed a general formula to achieve the highly sought-after doneness of “rare” to “medium-rare”: Allot 15 to 16 minutes per pound at 350°F; for a “medium” degree of doneness, allow 16 to 18 minutes per pound in a 350°F oven.
Although this formula holds true for many cuts of meat, there are several factors to consider that may affect the specific cooking time of your protein. For example, is your cut bone-in or boneless? Is the cut dry- or wet-aged? How much fat marbling is there? How thick is the cut? And finally, was the cut at room temperature or cold when placed in the oven? (Hint: You want to start roasting your protein once it’s at room temperature to ensure uniformity in cooking.)
So while my formula will give you an accurate time range for your roast, your best bet is to rely on an instant-read thermometer to tell when the meat has reached your desired temperature. For the most accurate reading, insert the thermometer into the thickest part of the roast (usually the center) or the area that takes the longest to cook (such as the leg of poultry or fowl). These temperatures are a good reference for determining the doneness of the meat:
Very rare: 115°F – 118°F
Rare: 118°F – 125°F
Medium-rare: 125°F – 130°F
Medium: 130°F – 140°F
Medium-well: 140°F – 150°F
Well-done: 150°F – 180°F
Another method for judging the approximate doneness of the roast is checking the color of the juices released when you pierce it with a thermometer or skewer. If the juices are red, the roast is rare or underdone; if they are pink, it is medium; and when they run clear, the roast is fully cooked or well-done.
Resting and Carving
Once you’ve achieved your desired degree of doneness, the next step is not to slice up your roast and dig in but rather to practice patience by allowing it to rest. This allows the internal juices to distribute more evenly throughout the meat, which translates to a moister interior. Skipping this step causes the juices to drip onto the cutting board or platter, leaving the roast dry and flavorless.
For small-size cuts, the resting period is half the amount of the cooking time; for larger primal and sub-primal cuts (including a prime rib of beef, whole turkey, or leg of lamb), allow the meat to rest up to one hour before carving and serving. Don’t forget to use a very sharp knife for slicing, as a dull knife will squeeze the juices out of the meat. When ready to serve, carve your roast in the kitchen, or add a festive flair to your presentation by portioning off the tender, juicy slices tableside.
Ted Siegel has been a chef instructor at the Institute of Culinary Education in New York City since 2001. Before that he worked at Chez Panisse in California and several restaurants in New York City, including Bistro du Nord, Coco Pazzo, and Orso.